
Laptop Screen Flickers Then Goes Black: Causes and Fixes

You're partway through a document, a match, or a call when the screen stutters, flickers hard and drops to black. The fans keep running. The power light stays on. Nothing you press brings the picture back.
The instinct is to assume the worst, usually a dead graphics chip or a dead motherboard. Both are possible. Neither is the most likely explanation. A laptop screen flickers then goes black because something in a chain has failed: the display driver, the panel, the backlight, the display cable where it bends through the hinge, the connector it plugs into, or the graphics hardware itself. They fail identically from the outside, and the cheapest links in that chain fail most often.
So before anything gets uninstalled or unscrewed, do three things in order. Confirm the laptop is still running, back up every file you can still reach, and run a short set of tests that separates software from hardware. Ten minutes of structured checks tells you which part of the chain is at fault, and often tells you that you don't need to pay anyone.
Table of Contents
Tell Software From Hardware in Ten Minutes - Five Tests, in the Order a Bench Technician Runs Them - Back Up Before You Go Any Further - Record Each Result
Fix Display Drivers and Settings in the Right Order - Six Steps That Prove or Eliminate Software - Why the Refresh Rate Matters
Repair Options, Turnaround and Risks Compared - What the Repair Saves Beyond the Laptop
Book a Repair Once Tests Point to Hardware - Put the Evidence in Writing - Check the Warranty Before Anyone Opens the Laptop - Ask for a Diagnosis, Not a Part Swap
Tell Software From Hardware in Ten Minutes
Timing answers the first question. Watch the screen from the moment you press power: a flicker or blackout while the manufacturer logo is still on screen, or inside the BIOS and UEFI settings pages, happens before Windows loads and therefore can't be a Windows driver. One observation removes most software theories in about fifteen seconds.
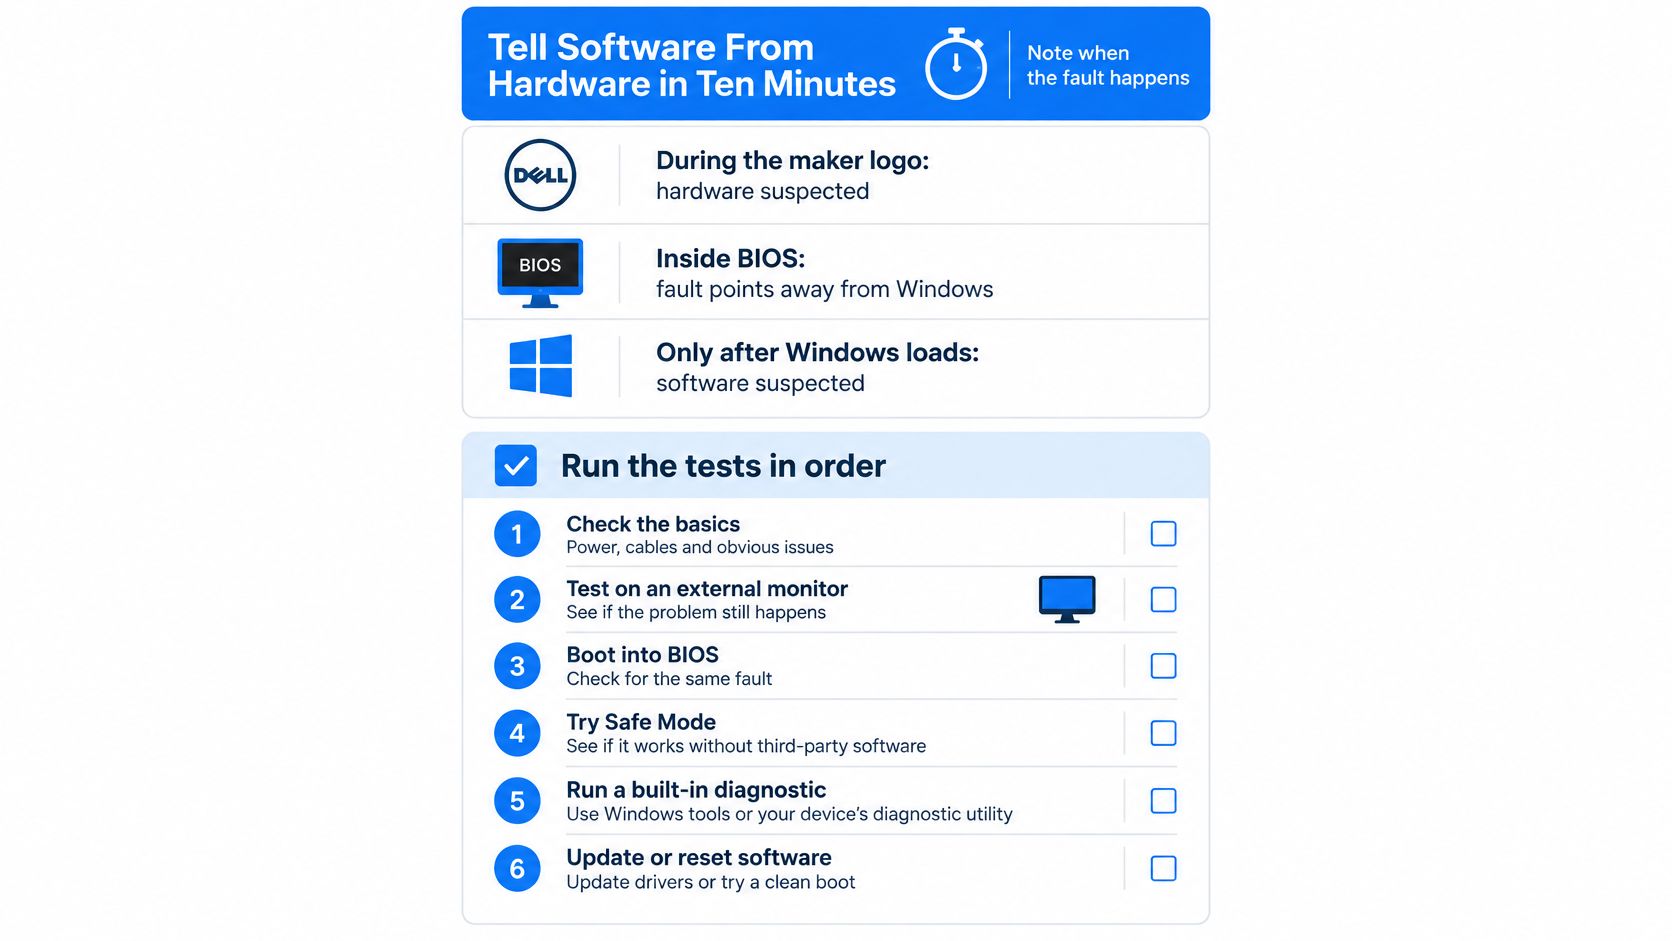
The checklist below is the order I would work in, and the order matters: the fastest, least invasive checks also eliminate the largest categories of fault.
Five Tests, in the Order a Bench Technician Runs Them
1. Open Task Manager. Press Ctrl+Shift+Esc and drag the window around. If Task Manager flickers along with everything else, the display driver is the more likely cause. If Task Manager stays steady while the rest of the screen flickers, an incompatible application is more likely. Microsoft's guidance on troubleshooting screen flickering in Windows covers the driver and app fixes worth trying once you know which side of that line you are on. The test costs seconds and tells you whether the fault lives in software at all, without opening the machine.
2. Plug in an external monitor. HDMI or USB-C, whichever the laptop has. An internal panel that flickers or blacks out while the external display stays steady points at the LCD panel, the backlight circuit or the eDP cable. Both displays failing together sends you to the GPU, motherboard power or firmware.
3. Shine a phone torch at the screen. Dim the room and angle the torch across the dark panel. A faint, ghostly version of your desktop means the panel is being driven and the graphics path is alive, but the backlight or its LED driver isn't lighting it. Total blackness with no image at all points to the panel or the signal reaching it.
4. Move the lid slowly, powered off first. Open and close it through the full range, then repeat with the laptop running. A fault that appears, vanishes or changes shape at a particular angle implicates cable fatigue or a marginal connector where the display cable passes through the hinge. Don't flex the hinge over and over to confirm it, and never reseat an internal cable with the battery still connected.
5. Check the machine is alive. Listen for the Windows start-up chime, tap Caps Lock and watch the key light, turn the volume up and press a key. If the laptop is running normally behind a dead display, your data is intact and the repair is a display-path job rather than a board-level one.
Practical rule: if the external monitor is stable, stop troubleshooting Windows. The fault is on the laptop's own display path, and no driver reinstall will reach it.
Each result narrows the field to a short list of causes:
Test | What you see | Likely cause |
|---|---|---|
Task Manager | Flickers along with the rest of the screen | Display driver |
Task Manager | Stays steady while the rest flickers | Incompatible application |
External monitor | Internal screen dead, external stable | Panel, backlight or display cable |
External monitor | Both screens fail | GPU, motherboard power or firmware |
Phone torch at an angle | Faint picture visible | Backlight or LED driver |
Lid angle changed | Fault changes with hinge position | Display cable or connector |
BIOS screen | Flickers or blacks out before Windows loads | Hardware, not Windows |
Back Up Before You Go Any Further
Intermittent faults become permanent ones, and a machine that blacks out under load is a machine you shouldn't keep working on. Copy what you need to an external drive or a cloud account while the display is still cooperating, or through the external monitor if the internal panel has given up. Everything after this is easier to face with your files already safe.
Record Each Result
Keep a short written log: each test, what you saw, the time of failure, and whether brightness or lid angle changed anything. A fault that only appears on a cold boot after a night switched off is a different animal from one that appears twenty minutes into a video, and the log preserves that pattern for a fault that refuses to reproduce on demand. Hand it to whoever ends up repairing the machine. It shortens their diagnosis and lowers the chance of paying for a panel that was never the problem.
Liquid Damage, Overheating and GPU Faults
Three hardware causes deserve their own gate before you run any of the above, because two of them get worse every time you press the power button. Start with the one people blame first.
The GPU is rarely the culprit. Read any long forum thread about a laptop screen that flickers then goes black and the graphics chip gets named by the third reply. It's the most expensive component in the display path and the least likely to have failed. A panel, a hinge cable or a backlight driver produces the same symptom for a fraction of the money, so rule those out first.
Liquid damage leaves evidence. A spill from weeks ago leaves a faint watermark along the panel edge, fuzzing on the keyboard ribbon, or green crust around a connector. If there has been any liquid at all, switch the machine off, unplug the charger and leave it off. Current through a damp board pushes corrosion deeper into the logic board, and what would have been a clean-up becomes a micro-soldering job. Your data has to come off the drive another way.
Heat shows up before the picture goes. Fans that ramp loudly just before the screen dies, a blackout after twenty minutes of gaming, dust matted across the heatsink fins, thermal paste dried to a chalky crust. A laptop that shuts down rather than losing the picture has a thermal problem first. Cleaning the fan and heatsink and repasting solves a fair share of these and costs little next to a board; the steps for a machine that cuts out under load are set out in this guide to overheating laptop fixes.
A black screen after a spill isn't a display fault until the board is dry, clean and known good.
GPU and board faults have a signature. Coloured lines, artefacts, or a screen that only dies once the discrete GPU takes over, which you can trigger by starting a game or exporting a video. A display that comes back after a hard reset and dies again under the same load is behaving like a graphics or power-delivery fault, not a panel.
If any of those fit, the panel is the wrong place to start. Replace one and the original fault returns, minus the money you spent.
Fix Display Drivers and Settings in the Right Order
If software is still in the frame, work through this sequence exactly as written. Bouncing between driver versions and Windows updates turns a two-hour job into a two-day one and hides the result you're trying to read.
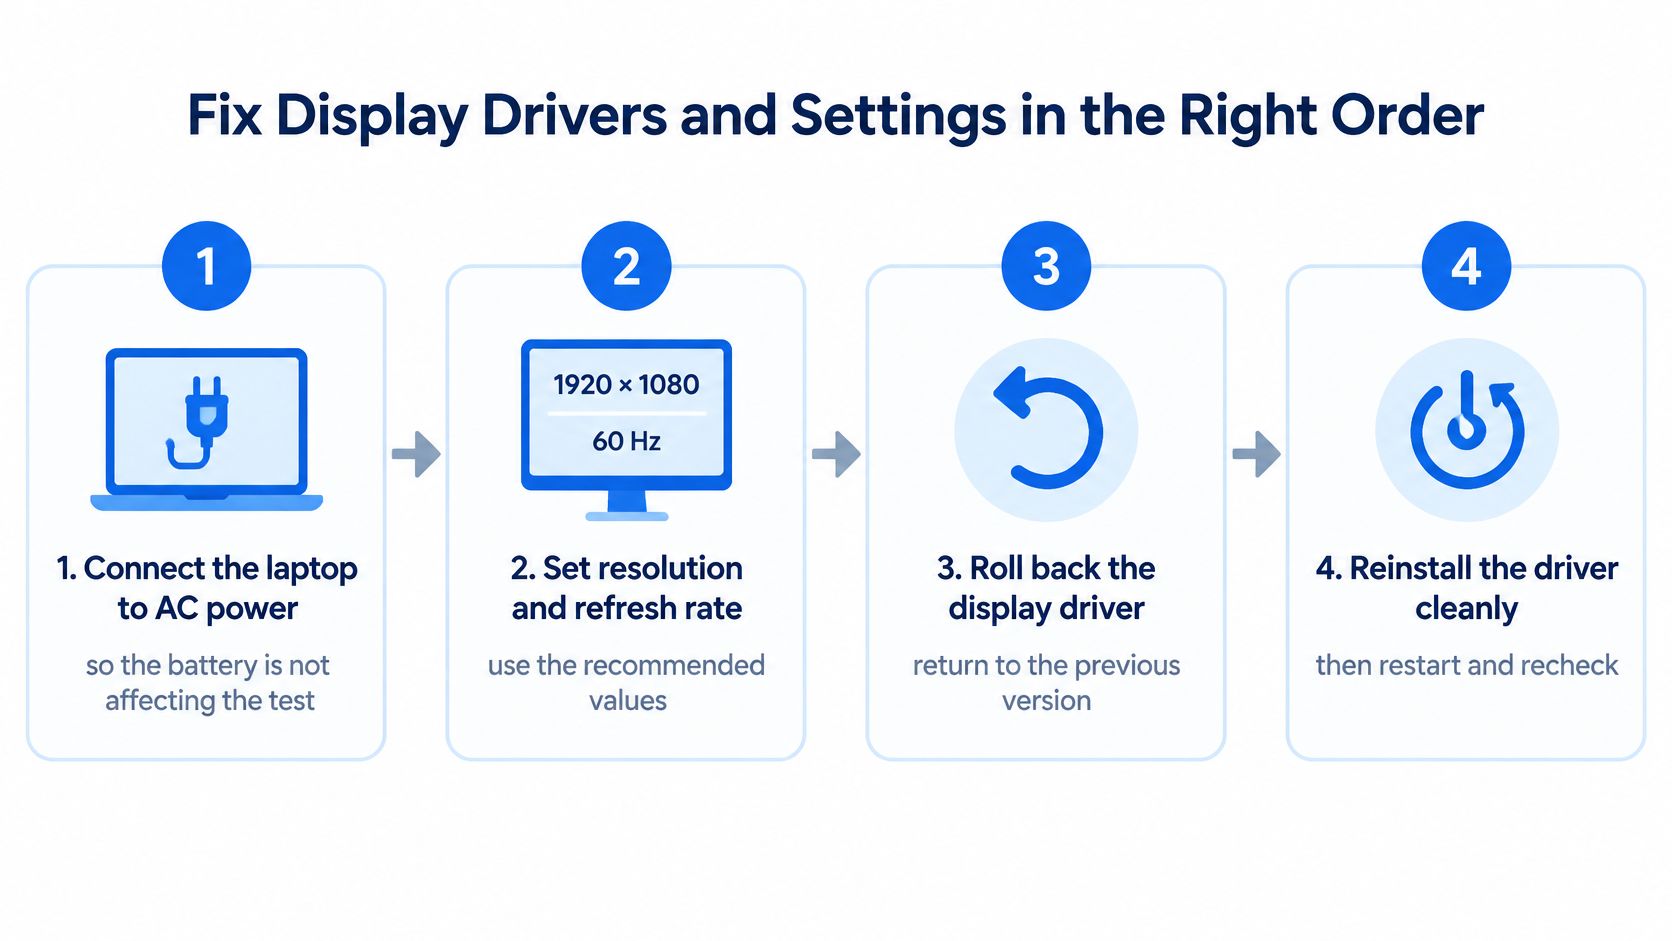
Six Steps That Prove or Eliminate Software
1. Run it on AC power. Battery-only operation changes brightness behaviour and power limits, so plug in first. Otherwise you're testing two variables at once.
2. Return to native resolution and refresh rate. Set the panel's recommended resolution and its native refresh rate in display settings. A panel pushed into a non-native mode can flicker in ways that look exactly like failing hardware.
3. Turn off HDR and variable refresh, and remove colour profiles. HDR, adaptive sync and third-party ICC profiles from a calibration tool all sit between Windows and the panel. Disable them one at a time and retest after each, so you know which one mattered.
4. Clean-install the graphics driver. Download the current driver for your exact model from Intel, AMD or NVIDIA rather than trusting Windows Update to pick the right one. Run the vendor's uninstaller, or a driver-removal utility, so the old installation is gone before the new one lands, then restart.
5. Retest at three brightness levels. Test at 100%, 50% and minimum, noting whether the flicker tracks brightness. Flicker that only appears at low brightness is characteristic of pulse-width modulation dimming rather than a failing GPU.
6. Run the acceptance tests. Cold boot from fully off, sleep and wake, charger-only, battery-only, and a slow pass through the hinge angles. A warm reboot proves nothing, because plenty of faults come back after a full cold start.
Why the Refresh Rate Matters
HSE's research on display flicker identifies refresh rates below 50 Hz as a consensus risk threshold for visible flicker, though modern LCD and OLED laptops may use high-frequency PWM or other brightness-control methods that need instrument testing rather than a visual judgement (HSE research on display flicker). Record the brightness level, whether the fault appears in BIOS and whether it reproduces on an external display. Those three notes are worth more than any amount of squinting at a flickering panel.
The same sequence, run end to end on a real machine, is easier to follow at speed:
If the fault survives all six steps, it isn't a driver and it isn't a setting. Close the settings panels and go back to the physical checks. And if a clean install leaves the machine with no picture at all, or the installer fails outright, that's a different fault class covered in this guide to a graphics card not working.
Repair Options, Turnaround and Risks Compared
Once the results point at a part, the question stops being diagnostic and becomes financial. The options run from a free afternoon to the price of a decent used laptop, so they're worth seeing side by side before you commit to anything.
Repair option | What is replaced | Typical turnaround | Main risk |
|---|---|---|---|
Driver reinstall or Windows repair | Software only | Same day to a few days | Data loss without a backup |
Display or hinge cable replacement | Cable and connector | A few days | Hinge stripped on many models; damage on reassembly |
Panel or backlight replacement | Display assembly | A few days, depending on parts | Replacement may not match the exact model |
Logic board micro-soldering | Power, charging or GPU circuit | Several days, complexity dependent | Fault may not be fully repairable |
Full logic board replacement | Motherboard | Longest lead time; confirmed on quote | Highest cost of the options; confirm the quote before work |
Cable and panel work is where most of the value sits, and most of the risk too. On plenty of modern laptops the display cable runs through the hinge, so the hinge assembly comes apart to reach it. That's fussy work with plastic clips and fine ribbon connectors, and a badly reassembled hinge is a worse problem than the flicker you started with. Panels add a matching step: connectors, mounting tabs and touch digitisers vary between models, so the part has to suit the exact machine.
Micro-soldering targets a specific circuit, a power rail, a charging controller or a GPU supply, and it can fail. It's still usually cheaper than a new board, and it keeps the machine that already holds your drive and your data.
What the Repair Saves Beyond the Laptop
WRAP reports that UK retail sales of electrical and electronic products represent approximately 1.4 million tonnes of materials across about 180 million products a year, that only around 7% of discarded products are reused, and that roughly one-third goes to landfill (WRAP guide to electricals). Laptops also appear in WRAP's list of five common household product groups responsible for 40% of the materials-related impact it highlights, alongside televisions, washing machines, refrigerators and freezers, and vacuum cleaners. Replacing a display assembly rather than the whole computer is the cheaper call for your wallet and the better one for that figure.
Displays have a disposal route of their own. A UK Parliament environmental audit appendix lists IT and telecommunications equipment, including laptops, and display screens, including computer screens, as separate WEEE categories, with a stated 80% recovery target and a 70% recycling target for both (Environmental Audit Committee report). A pulled screen or a dead board belongs in that system, not a bin bag.
Get the price and turnaround in writing before any work begins, and treat a quote that arrives without a diagnosis as an estimate rather than a price. This guide to laptop screen repair cost sets out what sits behind the figure and why it moves between models.
Book a Repair Once Tests Point to Hardware
A diagnosis is only worth paying for if the technician can reproduce the fault. Your job is to hand over the conditions that make it happen.
Put the Evidence in Writing
Give the workshop your log: when each failure occurred, whether it follows brightness or lid angle, what the external monitor did, and whether the BIOS screen ever flickered. An intermittent fault that shows up only on a cold morning is hard to chase on a bench that's been running all day, and your notes are what let someone reproduce it.
Check the Warranty Before Anyone Opens the Laptop
Read the terms first. Our warranty covers motherboard, CPU, GPU and RAM failures, along with hardware-related screen defects such as backlight failure or dead pixels that appear after purchase. It doesn't cover accidental damage such as drops, liquid spills or cracked screens caused by impact. Any attempt by a third party to open or modify the hardware voids the warranty, so a well-meant repair by a friend can cost you cover you already had. If the laptop is still on a manufacturer's plan, establish the position before a single screw comes out.
Ask for a Diagnosis, Not a Part Swap
The quote should name four things: the diagnosed fault, the component being replaced, the total price and the expected turnaround. If a workshop can't be specific about which of those applies, it's guessing with your money.
Ask for this in writing: the diagnosed fault, the component being replaced, the total price and the expected turnaround.
Steel City IT works on screens, display cables and logic boards from the Frecheville workshop, including board-level micro-soldering for liquid and power faults that many shops decline. Most jobs come back within a few days, depending on complexity. That's the point to book, once the tests have narrowed the fault to a part rather than a hunch.
If your laptop screen flickers then goes black and the checks above have narrowed it to the panel, the hinge cable or the board, Steel City IT can pick it up from there. We diagnose and repair screens, display cables and logic boards for Sheffield customers from our Frecheville workshop, with micro-soldering for liquid and power faults, most jobs back within a few days. Bring the laptop in, or visit Steel City IT to arrange a diagnosis before you spend anything on parts.