
How to Fix Blue Screen of Death: Stop Codes and Dumps

Your fans ramp up, the mouse freezes mid-click, and the screen drops to blue for barely two seconds before the machine restarts itself. By the time you've found the login box the message is gone, and all you know is that something called a stop code flashed past. Or the crash is slower and nastier, and Windows won't get past the spinning dots at all: every restart walks you back to the same blue panel.
Windows runs most of its core work, drivers included, in kernel mode, where there is no safety net for a critical fault. When a driver writes to memory it doesn't own, a RAM module returns a wrong bit, or the processor reports an uncorrectable hardware error, the kernel has two choices. It can carry on and corrupt your files, or it can stop instantly. It stops. That blue panel is a deliberate shutdown, and the dump file it writes on the way down is the closest thing you'll get to a black box recording.
The instinct is to restart and hope, then to reinstall Windows when hope runs out. Both destroy evidence. I'd rather you treated the first crash as a scene to preserve: note the code, copy the dump, back up the files that matter, and only then start changing things. That order is what stops the same machine coming back a week later with a different blue screen and the same underlying fault.
Table of Contents
Stop Codes and What Each One Usually Means - Where the code hides when the screen flashes past - What the codes sort into
Reading a Memory Dump When the Stop Code Is Not Enough - Set Windows up to keep the recording - Three commands that do the work - The control that separates a diagnosis from a guess
Testing RAM, Storage and Heat When Drivers Are Clean - Take the overclock out of the equation - Test RAM one module at a time - Read the drive before you trust it
When to Clean Install, Recover Data or Book a Diagnostic - Why the drive gets imaged before anything is installed - The routes that cost you the most - What to bring to a diagnostic
Stop Codes and What Each One Usually Means
Say a desktop blue screens every afternoon around four, roughly twenty minutes into a video call. Same time, same workload, same code. That repetition is a gift. A crash with a predictable trigger tells you far more than a single random stop, because it hands you a variable you can change.
Where the code hides when the screen flashes past
Windows logs every bug check. Open Event Viewer, go to Windows Logs > System, filter for Critical and Error, and look for a source called BugCheck with Event ID 1001. That entry stores the stop code and four bug-check parameters, which are the memory addresses the fault touched. Reliability Monitor shows the same event as a red cross with the code underneath. If the panel is still on screen, photograph it with your phone, including any line that starts "What failed".
What the codes sort into
The table below is the quick reference. Read it as four branches, not twelve separate puzzles: driver faults, memory and storage faults, graphics faults, and hardware or firmware faults.
Stop code | Usual cause | First check |
|---|---|---|
IRQL_NOT_LESS_OR_EQUAL | Faulty or incompatible driver | Note the named driver and roll it back |
SYSTEM_SERVICE_EXCEPTION | Driver, antivirus or security software | Remove recent security software or driver updates |
PAGE_FAULT_IN_NONPAGED_AREA | Driver, RAM or failing drive | Run Windows Memory Diagnostic and check the drive |
KERNEL_SECURITY_CHECK_FAILURE | Driver or corrupted memory | Check driver changes, then run a memory test |
MEMORY_MANAGEMENT | RAM, paging file or failing SSD | Test RAM one stick at a time |
CRITICAL_PROCESS_DIED | Corrupted system files | Run sfc /scannow and DISM |
NTFS_FILE_SYSTEM | Failing drive or file system corruption | Back up data, then run chkdsk |
INACCESSIBLE_BOOT_DEVICE | Storage driver or changed SATA or NVMe mode | Check BIOS storage mode and recent changes |
VIDEO_TDR_FAILURE | GPU driver, overheating or unstable GPU | Roll back the GPU driver and check temperatures |
WHEA_UNCORRECTABLE_ERROR | CPU, RAM, power or motherboard fault | Check Event Viewer and run hardware tests |
CLOCK_WATCHDOG_TIMEOUT | CPU, firmware or virtualisation fault | Update BIOS and return CPU settings to default |
DRIVER_IRQL_NOT_LESS_OR_EQUAL | Named third-party driver | Roll back or update the driver named on screen |
A code on its own narrows the field. A named file narrows it much further, and that's why the "What failed" line matters more than the headline. is the NVIDIA display driver, is Intel storage, is networking, is power management. When you have a filename, you have a suspect rather than a category.
Practical rule: if the stop code changes between crashes, suspect hardware. If the same code and the same file keep appearing, suspect that driver first.
So the branch is simple. Driver-flavoured codes get software work first, starting with the change you made just before the crashes began. Codes that point at memory, storage, heat or power get hardware testing first, because rolling back drivers on a machine with a failing DIMM wastes an afternoon and fixes nothing.
How to Fix a Blue Screen Step by Step
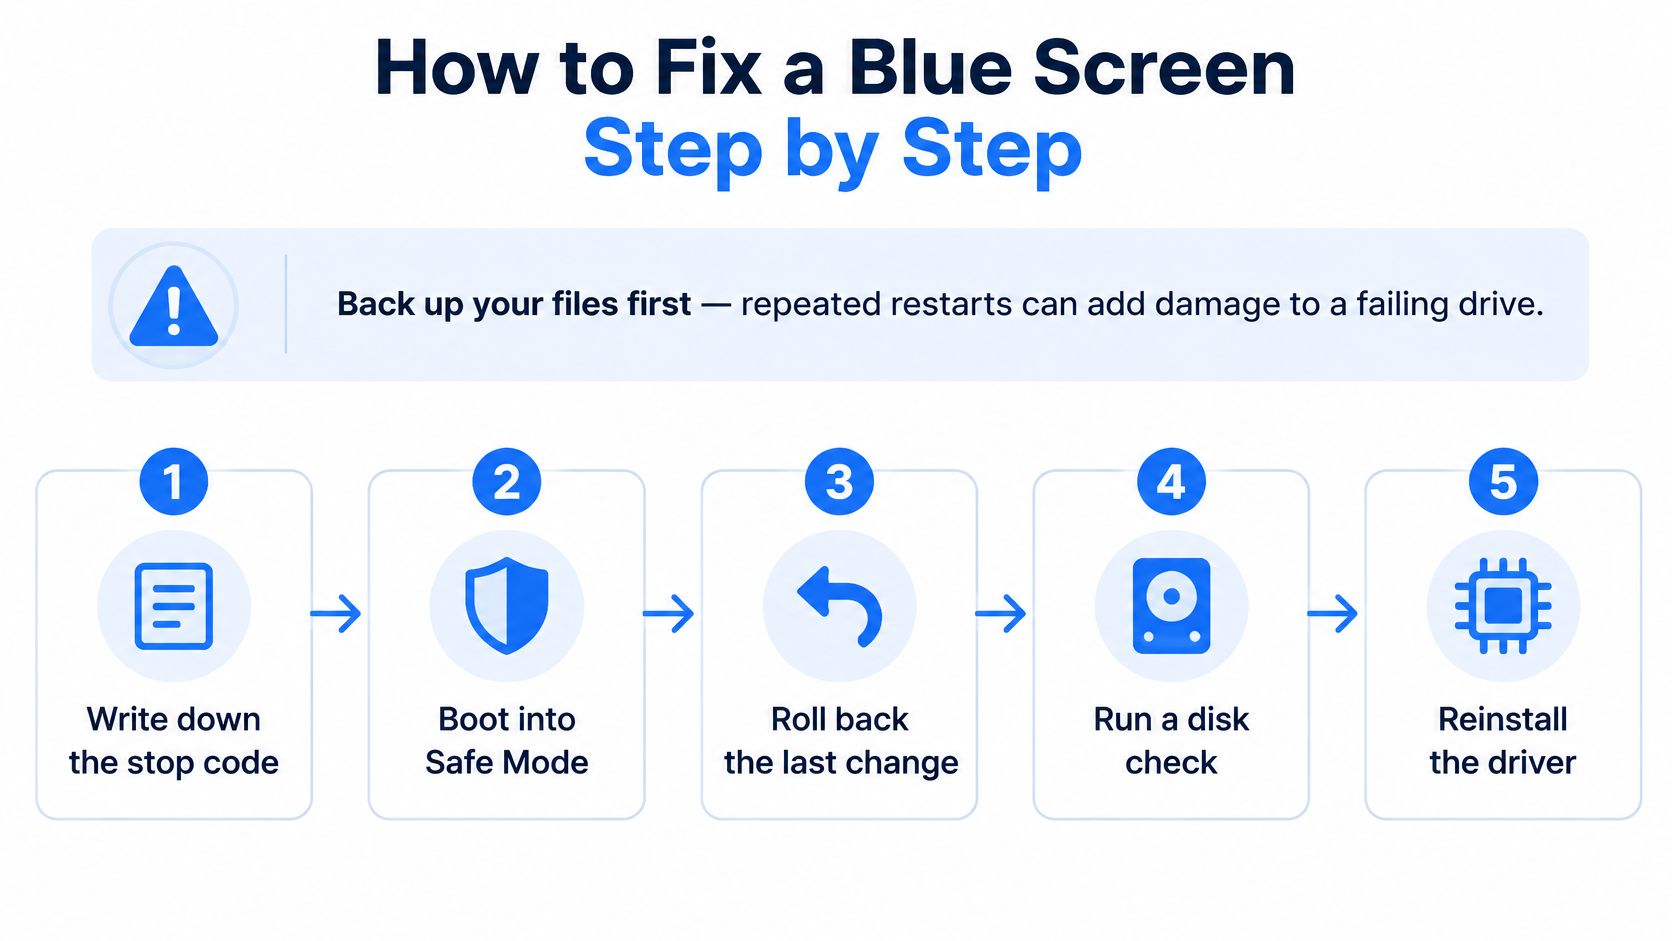
A PC crashes, restarts, then crashes again before you can identify the cause. Stop repeating the restart cycle. First preserve the evidence and protect your files: copy irreplaceable documents, photos and work files to an external drive or cloud folder, especially if you suspect storage trouble.
The five-step visual shows the repair sequence. The steps below explain what to do and what each result can tell you.
Record the crash before changing anything. Note the stop code, time and what the PC was doing; photograph the screen if needed. This gives you a baseline for checking whether the same fault returns after a repair.
Use Safe Mode if Windows keeps restarting. Three forced shutdowns during boot can open the Windows Recovery Environment. From there, choose Startup Settings and Safe Mode. If the crash stops in Safe Mode, that points toward a driver or other software that does not load there. It does not rule out hardware.
Undo the change that came just before the crashes. Sort installed apps by date, roll back a recent driver in Device Manager, or uninstall the latest quality update. Change one thing at a time, then check whether the same stop code returns.
Install drivers from the device maker. Get graphics, chipset and network drivers from the relevant motherboard, laptop or graphics-card manufacturer. Avoid generic driver-updater tools, which can install the wrong package or make it harder to identify what changed.
Repair Windows system files in the right order. Open Command Prompt with administrator privileges and run first. Then run . DISM repairs the component store that SFC uses, so running DISM first gives SFC a sound source for its repair.
Try System Restore if you cannot remove the change directly. Choose a restore point from before the first crash. It can reverse software changes without deleting personal files, but it will not fix failing hardware.
Stop repeating software fixes if the crash persists. If the same blue screen returns after these steps, another rollback or repair run is unlikely to help. Preserve the stop code and any dump files for the next diagnostic stage instead of reinstalling Windows without evidence.
The video below follows the same repair sequence on screen.
If Windows will not reach the desktop, follow the Recovery Environment options in this guide to repair Windows on startup. For a repair business, recording the stop code, dump reference and parts fitted on each ticket makes diagnosis easier to repeat. That is one use for computer repair shop software.
Malware, third-party software and OS updates are not covered by Steel City IT's warranty. Preserve the crash details before changing the system, so the cause is clearer if you need a repair.
Reading a Memory Dump When the Stop Code Is Not Enough
A stop code tells you which subsystem failed. A dump tells you which module was executing when it did. When the same code returns after a rollback, guesswork becomes expensive, and the dump is where the evidence is.
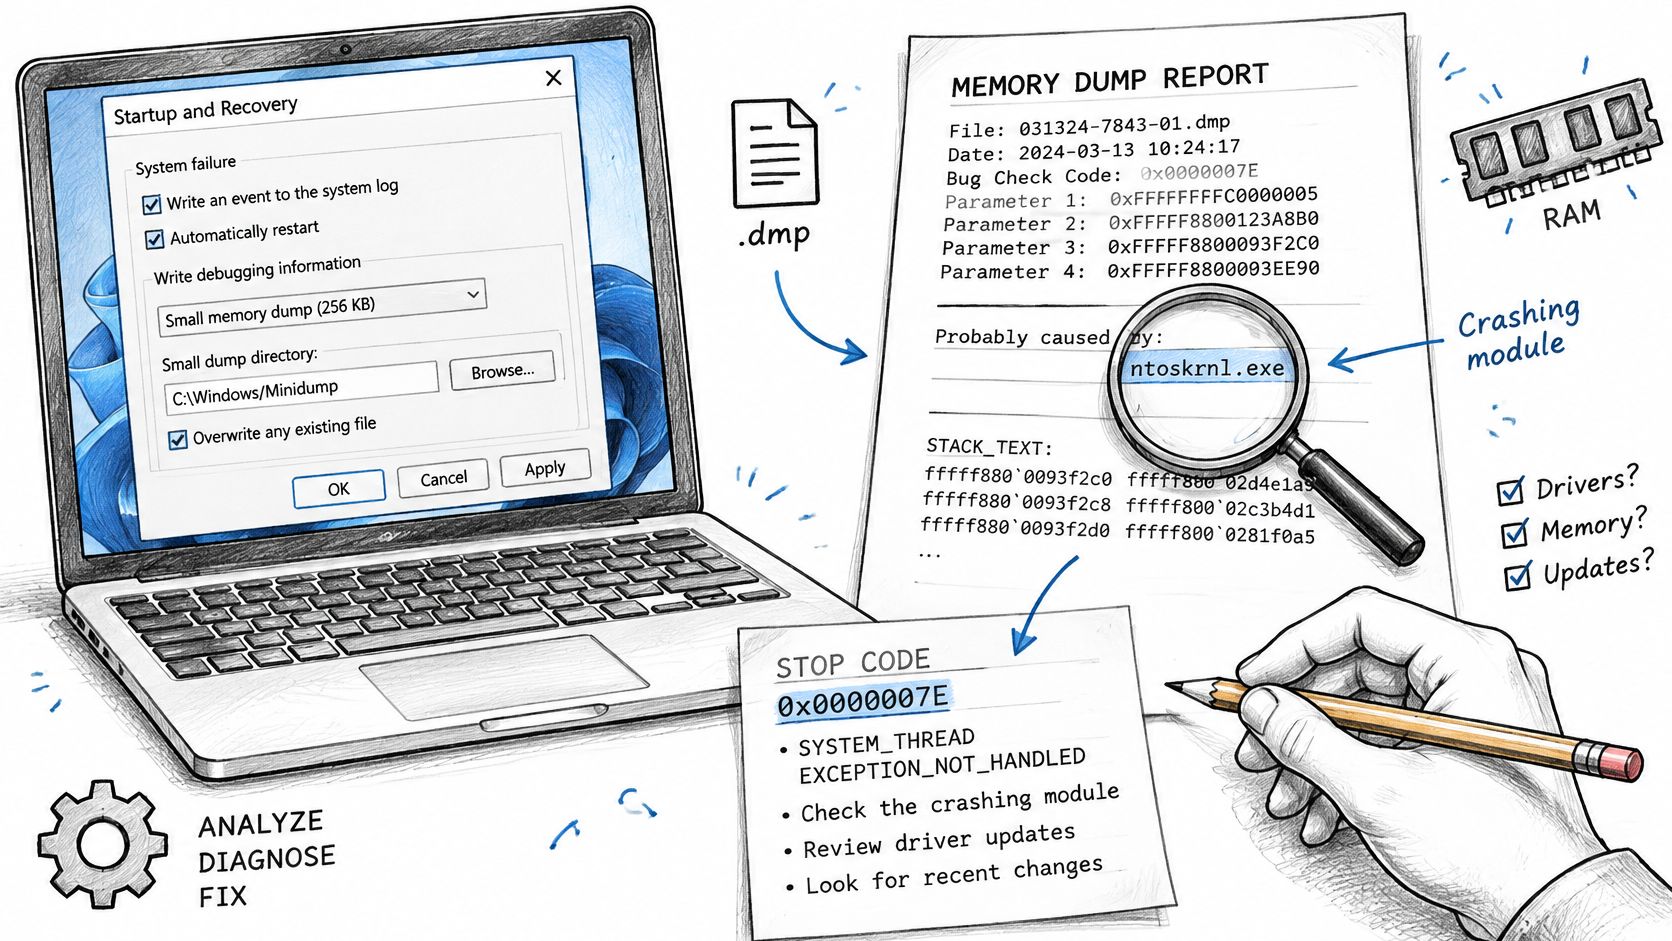
Set Windows up to keep the recording
By default some machines write only a small minidump, or nothing useful once the disk is full. Go to System Properties > Advanced > Startup and Recovery > Settings and set the dump type to Kernel memory dump, or Complete memory dump if you have the disk space and want the full picture. The kernel dump lands at , with smaller files in .
Windows may overwrite the file on the next crash, so copy it off the machine, ideally to a USB drive or a second PC. Work on the copy. The original disk should stay as close to the crash state as you can keep it.
Three commands that do the work
Install WinDbg from the Microsoft Store, let it load the Microsoft symbol server, then open the dump. The commands below are the whole toolkit for most jobs.
runs the automatic analysis and prints a block of fields, including MODULE_NAME, IMAGE_NAME and FAILURE_BUCKET_ID, plus a "Probably caused by" line. Read the module fields first, because they name what was loaded at the fault address.
followed by the driver name lists that module's version and its timestamp. A driver dated three years before the rest of the system is a strong candidate for an incompatibility.
clears Driver Verifier once you've finished. Never leave it running on a working machine, because it slows everything down.
The control that separates a diagnosis from a guess
A single "Probably caused by" line can name the victim rather than the culprit: a driver that was in the wrong place when something else corrupted memory. The reliable test is repetition across several dumps. A module that appears in the stack of three separate crashes is evidence. A module that appears once, in a dump you happened to open first, is a coincidence.
Driver Verifier is the targeted tool for the hard cases, since it deliberately stresses suspect drivers and produces a more informative crash on purpose. Treat it with care. Create a restore point, confirm you can get into Safe Mode, start with your suspect drivers, and if you must test unsigned or third-party drivers, do it in groups of roughly 10 to 20 rather than switching verification on for everything. When the culprit is identified, run , reboot, and retest without the overhead.
This workflow is set out in Microsoft's guidance on blue screen data and dump analysis, which also recommends checking Event Viewer and the bug-check parameters before you reach for a debugger. Preserve the dump before you repair, and the fault trail survives long enough to be useful.
Testing RAM, Storage and Heat When Drivers Are Clean
When three dumps name three different drivers, the dump is telling you something: the fault isn't in a driver. That's the moment to stop swapping software and start separating software faults from hardware instability with controlled isolation.
Microsoft's own guidance on bug checks and blue screens points at Windows Memory Diagnostics and Event Viewer as relevant checks, and recommends reviewing what changed immediately before the stop error, including newly installed devices. So the first hardware step is subtraction, not addition: remove every variable you introduced.
Take the overclock out of the equation
Disable XMP or EXPO memory profiles, any CPU or GPU overclock, and third-party tuning utilities, then set timings and voltage back to the manufacturer's defaults. An unstable memory profile produces exactly the kind of intermittent, workload-dependent crash that mimics a driver fault. Test a cold boot and a warm boot, since a machine that fails only when it's warm points at a different problem to one that fails from cold.
Test RAM one module at a time
Run Windows Memory Diagnostic (), then read the result in Event Viewer afterwards, because the test runs outside Windows and won't tell you anything on screen when it reboots. Any reported error is a hardware or configuration failure until proven otherwise.
If you have two or more sticks, test them individually and in different slots. One faulty module in a four-stick kit looks exactly like a whole kit failing, and swapping slots tells you whether the fault follows the stick or stays with the board.
Check | Tool or location | Sign of a fault |
|---|---|---|
Memory test | Windows Memory Diagnostic, then Event Viewer | Any reported error, even after one pass |
RAM isolation | One stick at a time, different slots | Crash follows one module or slot |
Storage health | SMART data from the drive's utility | Reallocated or pending sectors, rising error count |
Disk integrity | chkdsk from an elevated prompt | Bad sectors reported or repeated file system errors |
GPU stability | Stress test with temperatures logged | Artefacts or driver resets under load |
Temperatures | HWiNFO or the motherboard utility | CPU or GPU reaching thermal limits, then crashing |
Hardware error log | Event Viewer, WHEA-Logger entries | Corrected or uncorrected hardware errors recorded |
Read the drive before you trust it
A drive that's slow to open folders, clicks audibly, or throws NTFS_FILE_SYSTEM is not a software problem you can patch. Pull the SMART data through the drive maker's utility, check reallocated and pending sector counts, then run if the file system is suspect. A drive that's failing gets its data copied off before anything else happens.
GPU temperatures come next, logged during a real load rather than at idle, because gaming crashes that escalate into blue screens usually start as thermal events. Our notes on GPU overheating fixes cover the airflow and paste side of that in more detail. Finally, if crashes persist on a clean driver baseline and passing memory checks, reproduce them under a known-good power supply or graphics card before condemning either component.
A single clean memory pass is not proof of stability. Faults can depend on temperature or load, so record the test duration, ambient temperature, BIOS version, RAM layout and exact stop codes, then test again when the machine is hot.
Skip the "driver cleaner" utilities and registry fixers as a first move. They erase the evidence you need and occasionally install a new fault of their own. And remember that opening the case yourself, or letting anyone else do it, voids the warranty, so check the terms before you start reseating memory on a machine that's still covered.
When to Clean Install, Recover Data or Book a Diagnostic
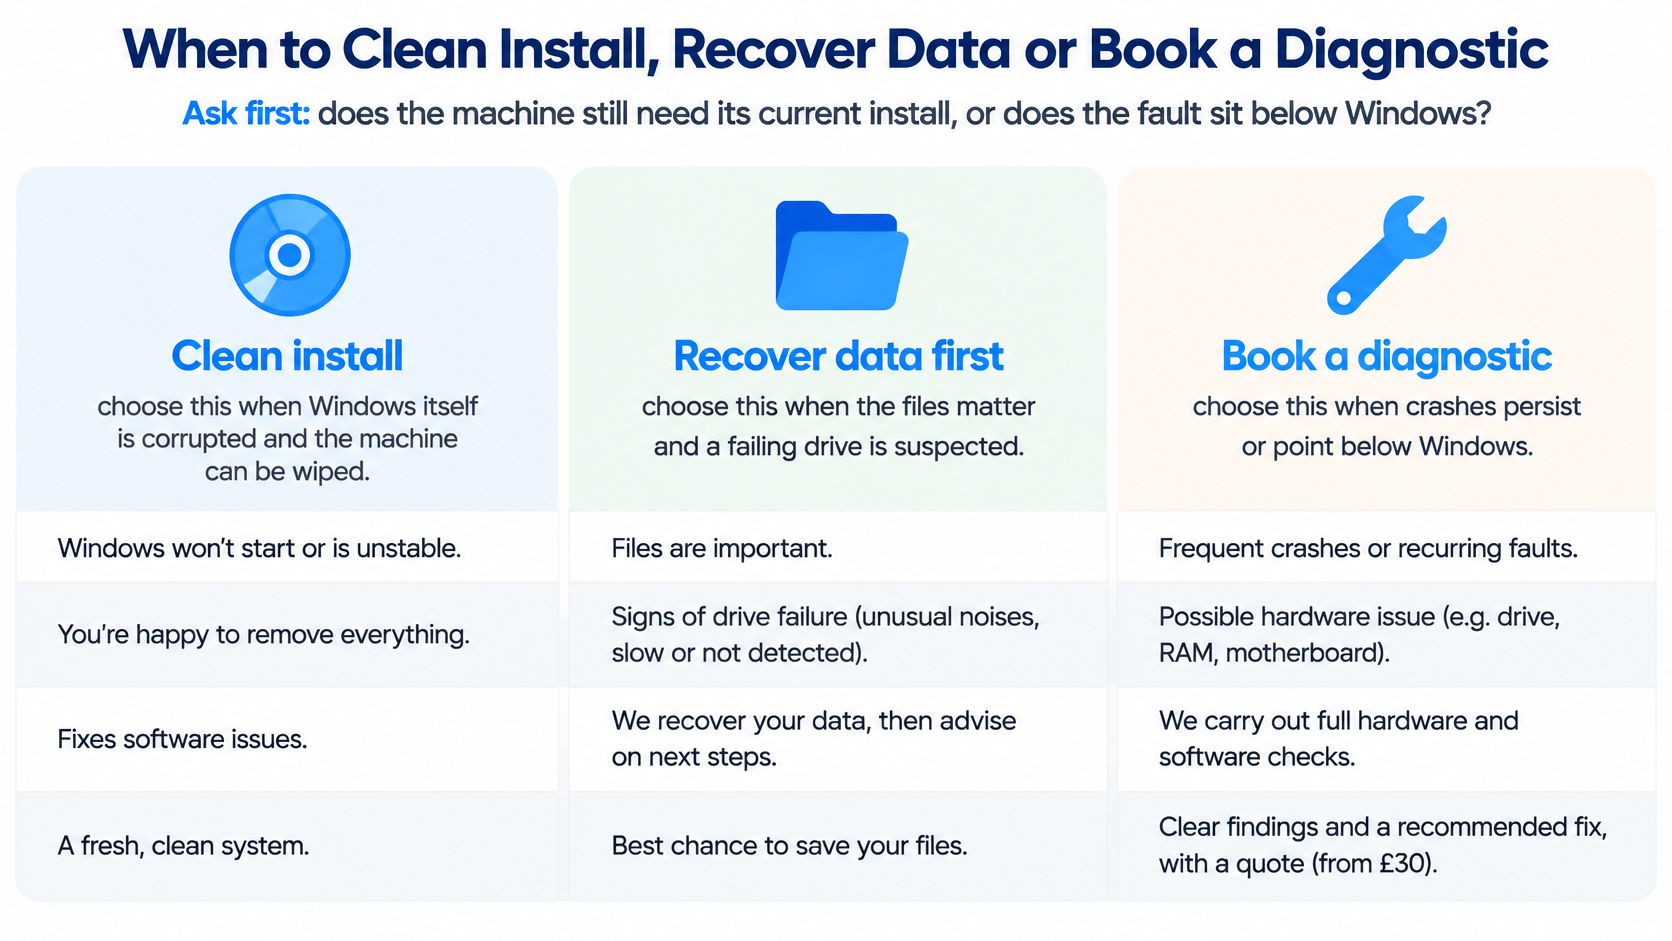
A blue screen can come from Windows, a failing drive, or another hardware fault. Choose the next step based on the evidence: preserve data and crash details before changing the system, then decide whether to repair Windows or test the hardware.
Situation | Best route | Why |
|---|---|---|
Crash started after a driver or update, Windows still boots | Roll back the change, then test Windows Update | The timing points to a software change |
Crash returns after clean drivers and a passing memory test | Image the drive, then consider a clean install | Preserve the current Windows state and files before rebuilding |
Clicking drive, slow reads or chkdsk errors | Stop, recover data, then replace the drive | Repeated repairs can make a failing drive harder to read |
Windows will not boot and no recent change | Use Windows Recovery Environment, after checking the drive and backing up files if possible | Recovery tools can repair Windows, but they do not rule out failing hardware |
RAM test fails in one slot or module | Test the module and slot separately, then replace the faulty part | Reinstalling Windows will not fix a hardware fault |
No power or charging after liquid damage | Arrange board-level diagnostics | The fault may be in the power circuitry, not Windows |
Why the drive gets imaged before anything is installed
A reinstall changes the Windows installation and can overwrite files or diagnostic evidence. If the drive is clicking, reads slowly, or reports file-system errors, stop running repair commands and prioritize data recovery. Even when the drive appears healthy, make a backup or image before a reset. This guide to whether reinstalling Windows deletes your files explains what a reinstall can remove.
The routes that cost you the most
Repeated restarts on a clicking drive, a clean install without a backup, and driver-cleaning utilities run during diagnosis can all make the original problem harder to identify. A successful boot proves only that Windows started once. If the crash returns, preserve the stop code and minidump rather than repeating the same reset.
Early, informed diagnosis can shorten the repair. Ignoring a recurring crash may allow a drive or other hardware fault to worsen, making data recovery or repair more difficult.
Decision rule: If the stop code repeats after a driver rollback and the memory test passes, arrange diagnostics before reinstalling Windows. If the drive is clicking or the machine will not power on, stop trying software fixes and seek help.
What to bring to a diagnostic
Bring the stop code, the time of the last crash, and the minidump copied to a USB drive if you can access it safely. Note recent changes, such as updates, new parts or software, along with the BIOS version and what the computer was doing when it crashed. These details help focus testing on the conditions that triggered the fault.
At Steel City IT in Frecheville, every repair undergoes a multi-point diagnostic check before and after service. Minor software repairs, such as virus removal, can typically be completed within 2-3 days; turnaround depends on the problem. If a device is beyond repair, Steel City IT explains this directly and can often recommend an affordable replacement or upgrade.
If your PC is stuck in a crash loop or the dump file needs analysis, Steel City IT offers Windows software troubleshooting, data recovery and hardware repair from its Frecheville workshop, serving Sheffield and nearby areas. Share the stop code and date of the last crash to help identify the next diagnostic step. Contact Steel City IT for an assessment.