
MacBook USB C Ports Not Working: Fixes That Work

You plug in your MacBook before starting work, but the battery keeps falling. Or the charger works while your external drive and monitor have disappeared. Before buying a replacement dock or trying every reset you can find, separate what still works from what doesn't. MacBook USB-C ports not working can mean a faulty cable, blocked contacts, a software conflict or an electrical fault, and each needs a different response.
Table of Contents
Match Your Symptom to the Likely Cause - Identify the Mac before choosing a reset
Run Quick Checks and Clean the Port Safely - Remove loose lint without damaging the contacts - Isolate the cable, accessory and port - Recognise the point where home testing stops
Reset macOS, Safe Mode and Power Management - Keep the software test controlled - Interpret the result without overclaiming
Diagnose Charging and Power Faults - Avoid the low-power charger trap - Treat liquid-related power failure differently
Confirm the Repair Route Before You Book - Distinguish connector work from board repair - Understand warranty cover and timing - Bring evidence that helps diagnosis
Match Your Symptom to the Likely Cause
Symptom | Most likely cause | First check |
|---|---|---|
Charging works, but data and accessories do not | Data lines or a charge-only cable | Known-good data-capable cable on each port |
Nothing charges and no light appears | Adapter, wall socket, power circuit or board fault | Different socket and known-good adapter |
Accessory detected in one orientation only | Contact damage or debris in the port | Test both plug orientations |
Every port dead after several known-good cables | Shared controller, power delivery or logic-board fault | Note liquid history and book an inspection |
External display blank while charging works | Display path or Thunderbolt fault | Test the display directly, not through a dock |
Plug loose and charging cuts out when moved | Bent contacts or damaged port mount | Stop applying force and inspect the port |
Problem began after a macOS update | Software or driver conflict | Restart, update and retry in Safe Mode |
Treat these as starting points, not confirmed diagnoses. A blank display doesn't prove the MacBook's display circuitry has failed, and a charging problem doesn't automatically mean the socket needs replacing. The useful evidence is whether the fault follows the cable, stays with a particular port or affects everything connected to the Mac.
A USB-C connector can carry charging power, USB data, DisplayPort video and Thunderbolt, so a successful charging test doesn't establish that the other functions work. Apple's guide to identifying Mac ports distinguishes these capabilities and identifies USB-C on the MacBook introduced in 2015.
Identify the Mac before choosing a reset
Open Apple menu > About This Mac and note the model and whether it lists an Apple chip or an Intel processor. If the Mac won't start, use its model information when arranging diagnosis rather than guessing from its appearance.
Apple silicon and Intel MacBooks don't use the same power-management reset procedures. A key combination intended for an Intel machine isn't a universal USB-C repair, and resetting anything before checking for physical damage can waste time or encourage unsafe retesting.
Also separate the visible symptoms carefully. A missing indicator light isn't conclusive because not every charging setup has one. Record whether macOS recognises an adapter, whether the battery gains charge and whether the connected accessory appears, rather than writing only that the port is dead.
Practical rule: Describe the failed function, not just the connector. “Charges, but won't detect a directly connected drive” gives a technician far more useful information than “USB-C broken”.
Before continuing, make a short note of:
Liquid history: Any spill, damp bag or moisture near the connector, even if the Mac continued working afterwards.
Mechanical condition: Whether the plug seats normally, feels loose or needs pressure to maintain a connection.
Tests already completed: The actual cables, adapters and accessories used, including whether they work on another compatible device.
If there's liquid or obvious physical damage, stop before the powered tests.
Run Quick Checks and Clean the Port Safely
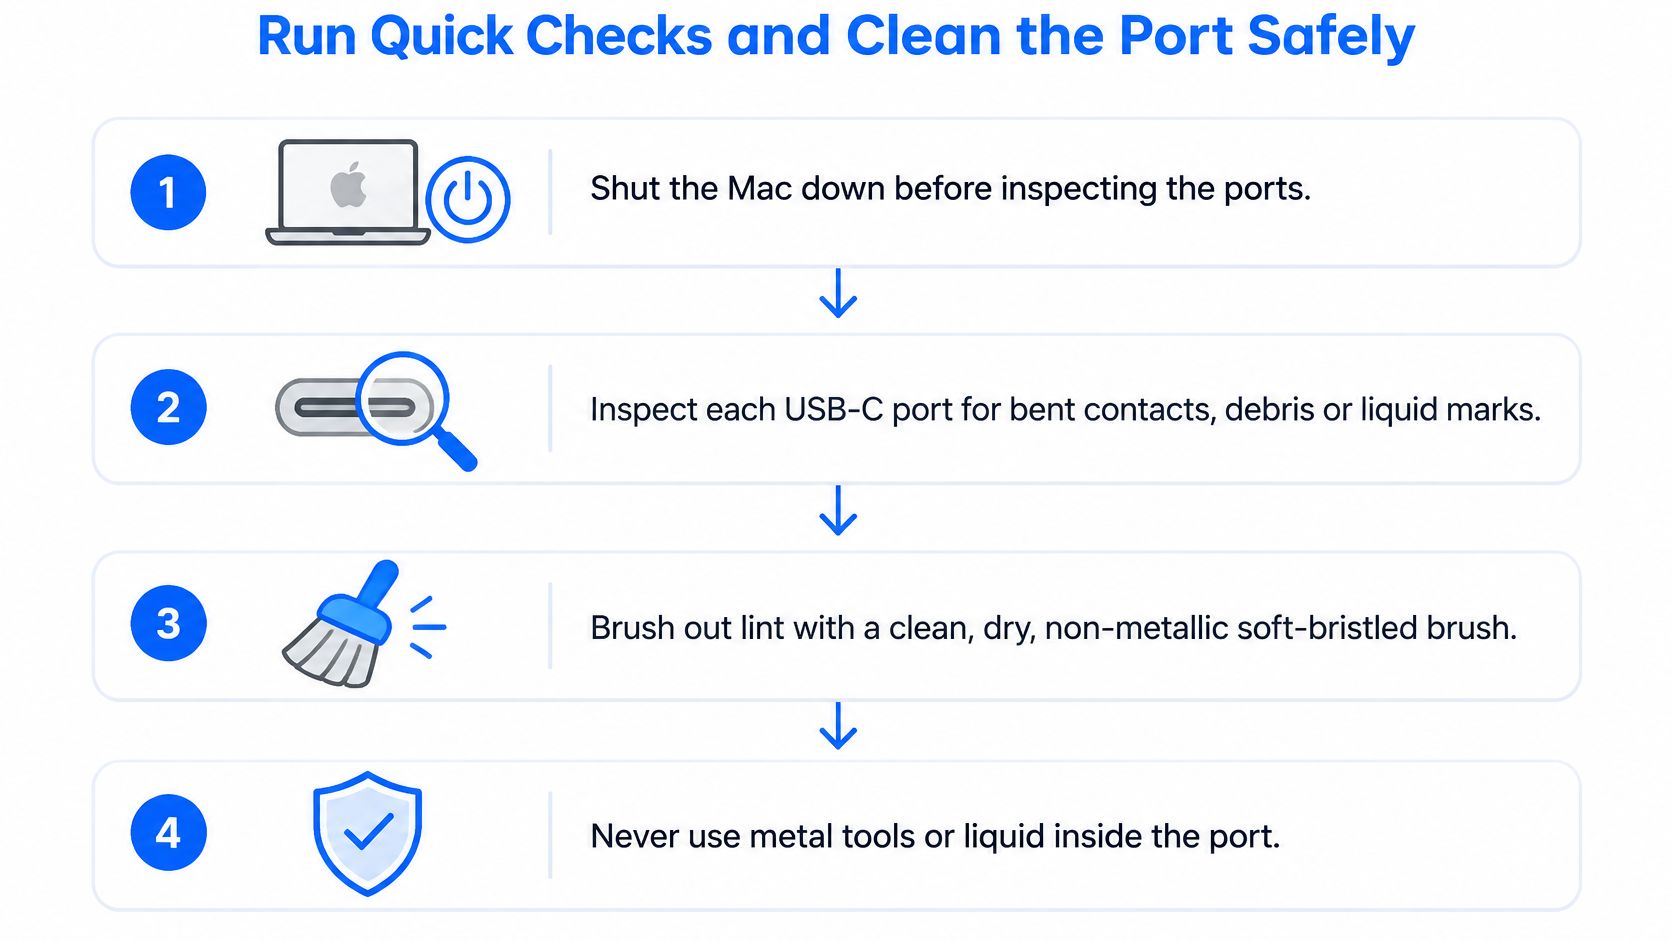
Shut the Mac down and disconnect its charger and accessories. Use a bright torch to inspect each USB-C opening. Look for compacted lint, a distorted centre tongue, bent metalwork, staining or corrosion, without inserting a tool to investigate.
A plug that won't seat fully may be meeting debris, but resistance can also mean damage. Don't push harder to distinguish them. Compare the affected port visually with an undamaged port, keeping the Mac switched off.
The inspection and cleaning limits are straightforward:
Remove loose lint without damaging the contacts
For accessible, dry lint, use a clean, dry, non-metallic soft-bristled brush, applying minimal pressure and brushing debris towards the opening. Don't force the bristles around the centre tongue or keep scrubbing at material that won't move.
Avoid pins, paper clips, metal picks, cleaning liquid and compressed air. Metal tools can damage contacts, while forced air can drive debris further inside. Apple's USB-C and Thunderbolt troubleshooting workflow supports physical inspection, gentle brush cleaning, direct accessory testing and checking both connector orientations.
A brush can remove loose contamination; it can't straighten damaged contacts, restore a broken mount or repair corrosion. If the connector still won't fit naturally, leave it alone rather than treating firmer cleaning as the next step.
Isolate the cable, accessory and port
Only proceed if the ports are dry and there's no indication of physical damage.
Start with a direct data connection. Connect a known-good, data-capable USB-C cable and compatible peripheral straight to the MacBook. Leave the hub, dock and extension cable out. Known-good means it has successfully performed the same job elsewhere, not that it's new.
Test that same cable and peripheral in every suitable port. Keep the rest of the setup unchanged so that moving the connection provides useful evidence.
Reverse the plug at the Mac end. Test both orientations in each port and record the result. USB-C should not need a preferred way up; repeatable one-sided operation suggests a contact problem.
Try a compatible mouse or keyboard, then a suitable Thunderbolt display directly. These tests answer different questions: basic USB detection doesn't establish that the Thunderbolt or display connection works.
Check System Information. Open it using Spotlight and inspect the USB and Thunderbolt hardware lists as appropriate. Note whether the accessory appears when connected. Detection without normal operation is different from complete absence, although neither result alone identifies the failed component.
Check the peripheral's own power source. A discharged wireless accessory, unpowered display or disconnected drive power supply can make a functioning Mac port look faulty.
Once those hardware checks are complete, restart macOS, install pending updates where practical and test in Safe Mode. Don't change the cable, accessory and software environment simultaneously, or you won't know which change mattered.
Recognise the point where home testing stops
A charge-only cable is not evidence that data transfer has failed. Likewise, an accessory working through a dock doesn't necessarily prove every function of the dock or Mac connection is healthy. Keep charging, basic USB and display results separate.
A connection that works only while you hold the cable at an angle is a repair symptom, not a usable workaround.
Failure isolated to a port or plug orientation points towards local contact or mechanical trouble. Consistent failure across the Mac with suitable, proven accessories makes a shared controller, power-delivery or logic-board fault more plausible, but still requires diagnosis.
Stop testing if you find looseness, movement-related cut-outs, visible corrosion or a liquid history. If the Mac was wet, don't power it on to see whether it has recovered. Forcing another connection can turn an intermittent fault into a damaged connector.
Keep inspection external. Under our warranty terms, any attempt by a third party to open or modify the hardware voids the warranty.
Reset macOS, Safe Mode and Power Management
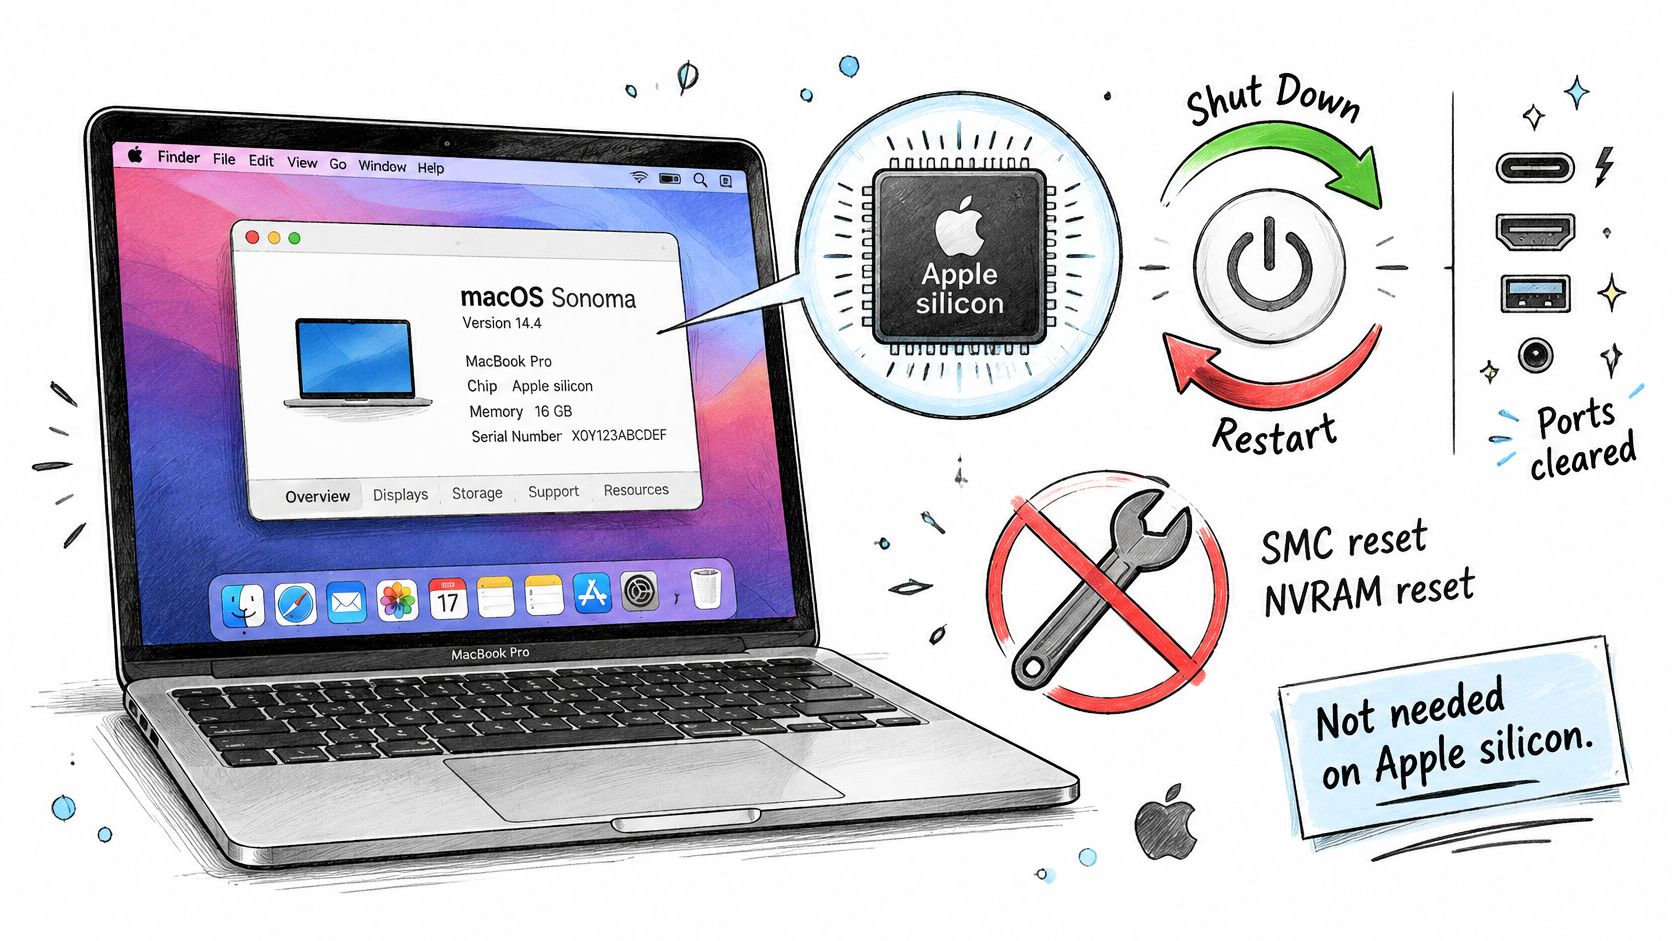
Check About This Mac before following reset instructions. Apple silicon MacBooks don't use the manual SMC or NVRAM key combinations associated with Intel models. On Apple silicon, begin with a complete shutdown and restart rather than searching for an equivalent keyboard shortcut.
Use the troubleshooting sequence below only after ruling out the stop signs:
Keep the software test controlled
Save your work and shut down completely. Disconnect non-essential accessories. Restart with only the known-good device needed for the test.
If the fault persists, start in Safe Mode. On Intel, hold Shift during startup. On Apple silicon, hold the power button from shutdown until startup options appear, select the startup disk, then hold Shift and choose Continue in Safe Mode.
Test the same port with the same cable and plug orientation. A changed result is useful only when the physical setup remains consistent.
Install available macOS updates through Software Update when the Mac has stable power and your work is backed up. Install applicable firmware updates offered through the supported update process rather than downloading unofficial reset utilities.
Restart normally and record whether the improvement persists.
If you have an Intel MacBook with a continuing power-management problem, use the SMC procedure specific to that model. Intel models with different security hardware use different sequences, so a generic combination copied from another MacBook isn't reliable.
NVRAM resetting is also Intel-specific: it uses Option, Command, P and R during startup, with completion behaviour differing between models. It isn't a sensible first response to a visibly damaged connector or an accessory that fails with only a particular cable.
Interpret the result without overclaiming
Operation in Safe Mode makes a software, extension or driver conflict more plausible. Unchanged behaviour raises suspicion of hardware, but doesn't prove the logic board is faulty. An incompatible peripheral can remain incompatible in either startup environment.
If troubleshooting has also exposed a startup problem, our guide to a MacBook stuck on the Apple logo addresses that separate symptom.
For a visual companion to the troubleshooting process, the following video is available:
Repeated resets won't restore a damaged contact or remove corrosion. After an unchanged controlled test, move towards diagnosis rather than repeating startup combinations, particularly if the Mac has been exposed to liquid.
Diagnose Charging and Power Faults
One dead USB-C port is a symptom to isolate, not proof that the port itself has failed. Check the power source, adapter, cable, connector contact and Mac response separately. For a dry, undamaged MacBook, start with these checks:
Test the wall socket with another appliance. Bypass any suspect extension lead.
Connect a known-good, compatible USB-C power adapter and charging cable directly to each charging-capable port.
Reverse the USB-C connector at the Mac and note whether external power is recognised in each orientation.
Disconnect and reconnect the adapter, then restart the Mac.
Shut down and wait a short while before retrying, then check that the ports and cable ends are clean and dry.
Record the result plainly: adapter recognised, battery charging, intermittent connection or no response. An adapter recognised by macOS while the battery stays at the same level points to a different symptom from no external power detection.
Avoid the low-power charger trap
A phone charger with a USB-C socket may not supply enough power for a MacBook. Slow charging, or a battery that falls under load, does not by itself show that the port is faulty.
The cable matters too. A charging cable may provide power without supporting the display or high-speed data connection you want to test. Successful data transfer also doesn't prove that the charger and cable can power the MacBook properly.
For practical guidance on choosing a suitable charging setup, see USB-C charging advice for MacBook users. Match the adapter and cable to the MacBook rather than relying on the USB-C plug shape alone.
Check the model's capabilities before calling a port faulty. If charging and display both fail, test each function directly rather than treating a dock's behaviour as the verdict. Our laptop charging port repair guide explains how connector faults differ from problems elsewhere in the charging system.
Treat liquid-related power failure differently
If several ports stop working after a spill, stop trying different chargers. Disconnect external power, shut down the Mac if it is running, and note what happened.
Stop condition: Liquid exposure followed by power failure calls for inspection, not another charging attempt.
Power applied to a wet or corroded circuit can worsen the damage. A physically intact socket may still sit above damaged power circuitry, so replacing the connector without diagnosis can leave the fault unresolved. Repeated home testing is where a basic check can become a bigger repair.
Confirm the Repair Route Before You Book
Confirmed finding | Usual repair route | What to expect |
|---|---|---|
Port loose or charging cuts out when moved | Port or connector repair | Diagnosis first; typical turnaround a few days, depending on complexity |
Liquid exposure with several ports failing | Board-level diagnostics and micro-soldering | Inspection before any replacement; timing depends on the fault |
Charging failure with good cable and adapter | Power-circuit diagnostics and repair | Charging port defects and power supply failures are covered by our warranty, subject to its terms |
Data failure on one physical port | Port-level repair | Physical I/O port faults are covered by our 12-month warranty, subject to its terms |
Software-only problem after an OS update | Software troubleshooting or clean reinstall if justified | Not covered by the hardware warranty; timing established after diagnosis |
The repair route should follow a confirmed finding, not the name of the symptom. A loose connector and a shared electrical fault may both produce charging failures, but they don't justify the same parts or labour.
For liquid exposure, widespread failure or a charging complaint that survives proper accessory testing, diagnosis comes before replacement. The cheapest-looking connector swap can miss a fault in the components that negotiate power or manage communication.
Distinguish connector work from board repair
A local connector fault calls for inspection of its contacts, mounting and connection to the rest of the machine. A board-level fault requires electrical testing to identify the damaged circuit rather than assuming the visible socket is responsible.
Micro-soldering means repairing small electronic components and connections on the board. It can be appropriate for a confirmed power or controller fault, but it's not a necessary upgrade to every USB-C repair. Our MacBook logic-board repair guide explains that route in more detail.
If you're comparing general repair explanations before deciding, BlissVector Gaming on MacBook fixes offers another resource. Keep the decision tied to your recorded test results rather than choosing a repair solely because another MacBook had similar symptoms.
Understand warranty cover and timing
Our 12-month warranty covers faulty Wi-Fi cards, Bluetooth modules and physical I/O ports. It also covers charging port defects and power supply failures. That describes the scope of our warranty, not automatic cover for every MacBook brought in with an existing fault.
Software-only problems caused by OS updates aren't covered by the hardware warranty. Problems caused by malware or third-party software are also excluded. A reinstall should therefore follow evidence of a software problem and a discussion of data, not serve as the default response to an undetected accessory.
We repair all types of Apple and Mac computers and have experience with both Windows and macOS. We're based in Frecheville, serving Sheffield, and typical repair turnaround is within a few days, depending on complexity. Board damage or an intermittent fault may require more investigation than a straightforward connector problem.
Bring evidence that helps diagnosis
Prepare the following before dropping the MacBook off:
The model and chip: Include the details from About This Mac if you can access them.
Your symptom list: State which functions fail and whether the result changes by port or plug orientation.
The tested equipment: Bring the charger, cables, adapters or dock involved, identifying which have worked elsewhere.
The liquid history: Describe what reached the Mac and whether it was powered or charged afterwards.
Your data priority: Explain whether accessing files matters more urgently than returning the machine to normal use.
Steel City IT offers MacBook USB-C fault diagnosis, connector repair and board-level micro-soldering in Frecheville, Sheffield. Visit Steel City IT to arrange an assessment, and bring your MacBook, charging equipment and test notes so we can identify the fault before recommending a repair.