
SSD Upgrade for Laptop: A Sheffield Guide

Traditional HDDs manage around 120 MB/s read speeds, while NVMe SSDs can reach approximately 7000 MB/s, so an SSD upgrade for a laptop can transform booting, loading and everyday responsiveness. In Sheffield-focused testing, boot time fell from 60 seconds to 10 seconds, and game loading dropped from 45 seconds to 8 seconds after moving to NVMe storage (UK SSD performance comparison).
You may be looking at a laptop that worked perfectly well when you bought it, but now takes long enough to start that you reach for your phone instead. Windows takes ages to appear, applications hesitate, and the hard drive light stays busy while you wait. That doesn't automatically mean the processor or motherboard has reached the end of its useful life.
A storage upgrade can be the sensible middle ground between tolerating poor performance and replacing the whole laptop. The important qualification is that the job starts with model-level compatibility and drive-health checks, not with a screwdriver. A replacement SSD has to fit the laptop physically, communicate through the correct interface and hold the data you intend to migrate. If the original drive is failing, a careless clone can make the situation worse.
Table of Contents
Why an SSD Upgrade Matters Now - The improvement you actually feel
Choosing the Right SSD for Your Laptop - Compare the connection before the capacity
Preparing Your System and Data - A safe pre-installation sequence - Why drive health changes the plan
Installing the SSD and Configuring BIOS - Firmware checks after the swap
Verifying Performance and Troubleshooting - The common failure points
When to Seek Professional Upgrade Help - Situations where DIY becomes poor value
Why an SSD Upgrade Matters Now
A laptop that once started promptly can become frustratingly slow as its mechanical hard disk ages. Windows takes longer to appear, programmes pause before opening, and routine file access can leave the system apparently frozen. That does not automatically mean the processor or motherboard needs replacing.
An SSD stores data in flash memory rather than on spinning platters controlled by a moving read/write head. The result is faster access to scattered files, which users notice when starting Windows, launching applications and opening larger files. A cited comparison reported HDD read and write speeds of about 120/100 MB/s, against approximately 7000/5000 MB/s for NVMe storage (the UK market performance reference). The same comparison recorded boot times changing from 60 seconds to 10 seconds and game loading from 45 seconds to 8 seconds, but those gains depend on installing a drive the laptop can actually support.
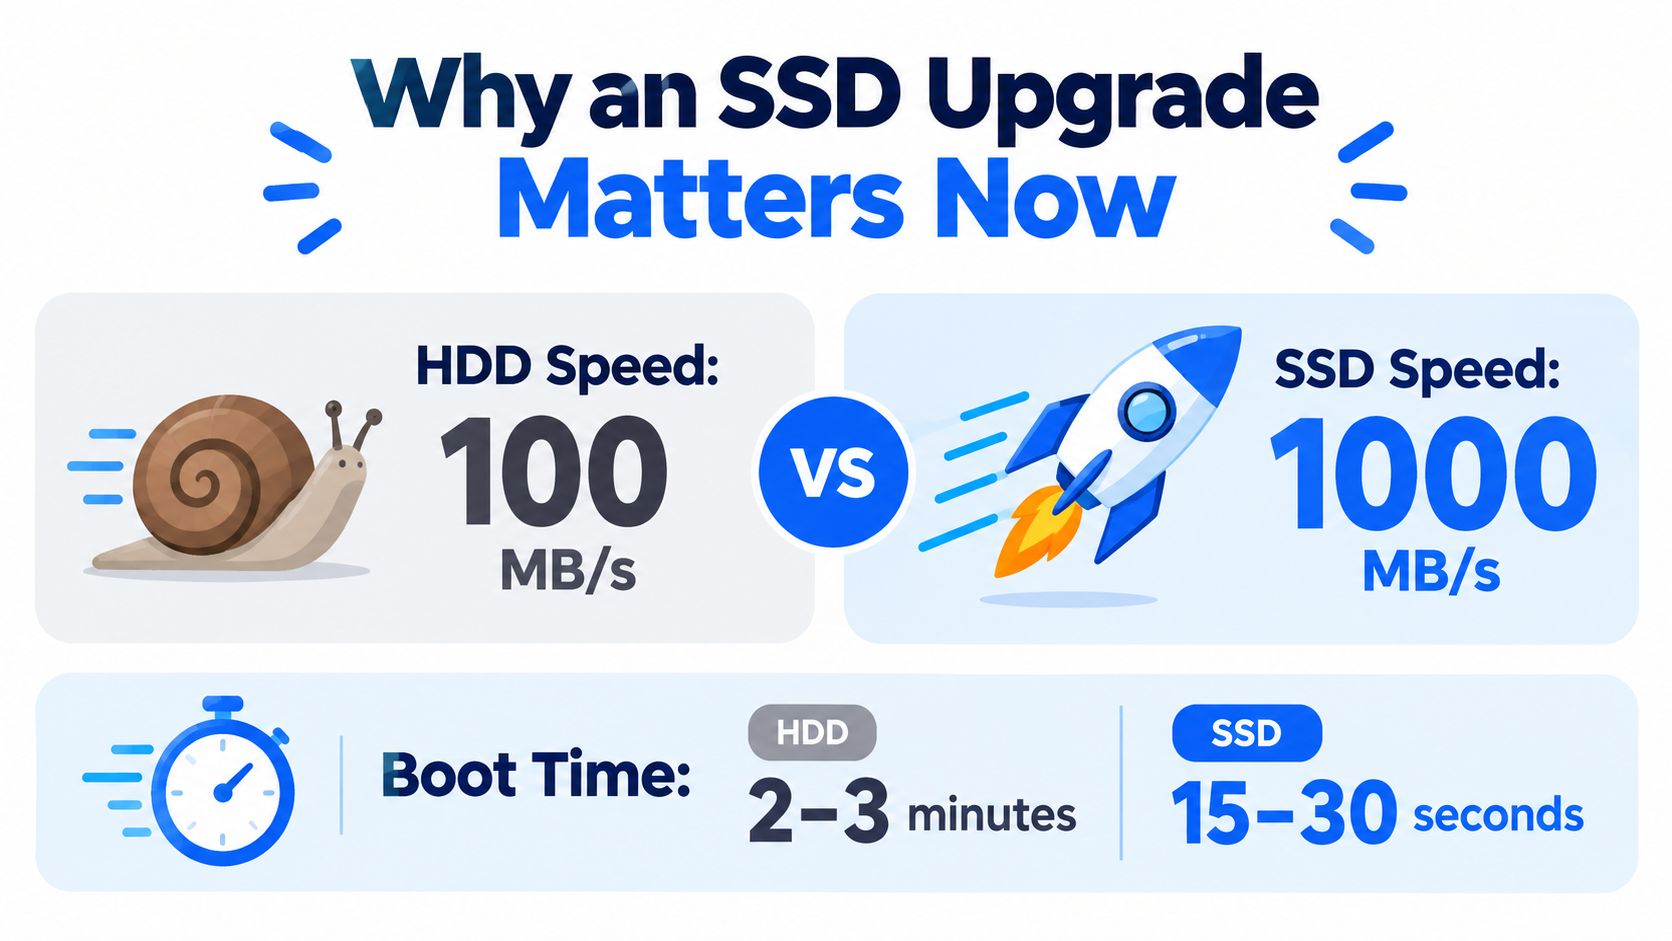
Practical rule: If the laptop still has a mechanical HDD and the rest of the system is stable, investigate storage before replacing the computer.
The improvement you actually feel
Synthetic figures describe transfer rates, not the whole user experience. An SSD reduces waiting while the system retrieves scattered files, so Windows feels more responsive and applications open with less hesitation. Routine tasks are also less likely to stall behind disk activity.
An SSD does not repair a damaged motherboard, add processor capability or remove malware. It will not guarantee higher gaming frame rates either, because those depend mainly on the processor, graphics hardware, software and cooling. Its useful contribution is shorter loading and a system that feels less reluctant.
Market tracking cited by Microscope reported SSDs in 66.7% of new laptops at the end of 2017, rising to 93.3% in the quarter covered by the report, while HDD share fell from 33.3% to 6.6% (UK storage market research). That change made replacing older mechanical storage more relevant for laptops still using it.
The decision should start with condition, not speed alone. Check the exact laptop model, generation, storage slot and interface before buying. Then assess the existing drive's health. If it is failing, cloning it can transfer corrupted data or stop partway through, so create a separate backup first and consider a professional migration.
For software checks before buying hardware, the PC performance optimisation guide provides a useful companion. If the screen, battery, keyboard and system board remain dependable, an SSD can restore responsiveness. If several of those parts are failing, improved storage may not make the repair economical.
Choosing the Right SSD for Your Laptop
The right SSD depends on your laptop's exact model, generation and storage layout. Brand names and operating systems are not enough. Confirm compatibility before buying the drive or opening the case.
A review covering 412 Dell, HP, Lenovo, Apple and Microsoft business laptops found substantial variation in upgradeability (UK laptop SSD guidance). Some laptops have a removable SSD, while others use storage soldered to the motherboard. The latter cannot be replaced through a normal drive upgrade.
Compare the connection before the capacity
Laptop storage arrangement | What it means | Common mistake |
|---|---|---|
2.5-inch SATA bay | Takes a 2.5-inch SATA SSD, often with a drive cable or caddy | Ordering an M.2 NVMe stick |
M.2 SATA slot | Uses the compact M.2 shape but communicates through SATA | Assuming every M.2 SSD is compatible |
M.2 NVMe slot | Uses PCIe and accepts an NVMe drive supported by the laptop | Ignoring keying, length or generation limits |
Soldered storage | The storage chip is attached to the board | Buying a replacement drive that cannot be installed |
M.2 identifies the physical shape, not the communication standard. Two modules can look alike while one uses SATA and the other uses NVMe. A 2.5-inch SATA SSD will not fit an M.2-only laptop, and an M.2 NVMe drive is not a universal replacement for an M.2 SATA module.
Read the manufacturer's maintenance manual, service guide or parts list for the full model code. The name printed on the lid may cover several configurations with different storage layouts. Confirm that the manual describes a removable drive, then check the supported interface, module length, keying and any capacity limits.
Capacity is the next trade-off. A cloned replacement must hold the data currently in use, not merely match the old drive's advertised size. A larger HDD cannot be cloned to a smaller SSD if the used data exceeds the SSD's available space. Removing temporary files and unused applications may reduce the requirement, but check the actual used capacity first.
Drive health also affects the choice between cloning and a clean installation. If the existing disk is unstable, repeated cloning attempts can fail or carry corrupted files to the replacement. Back up important data separately before migration, and stop treating a failing drive as a routine cloning source.
Do not buy the fastest-looking drive until the laptop manual confirms that the slot supports it. Compatibility beats headline speed.
A SATA SSD remains a sensible choice where the laptop supports only SATA. An NVMe model in a SATA-only slot will not deliver its advertised interface performance. Thin laptops may use soldered storage or restrict access so heavily that board-level work is required. That is a poor DIY job unless the model documentation clearly confirms a replaceable drive.
Preparing Your System and Data
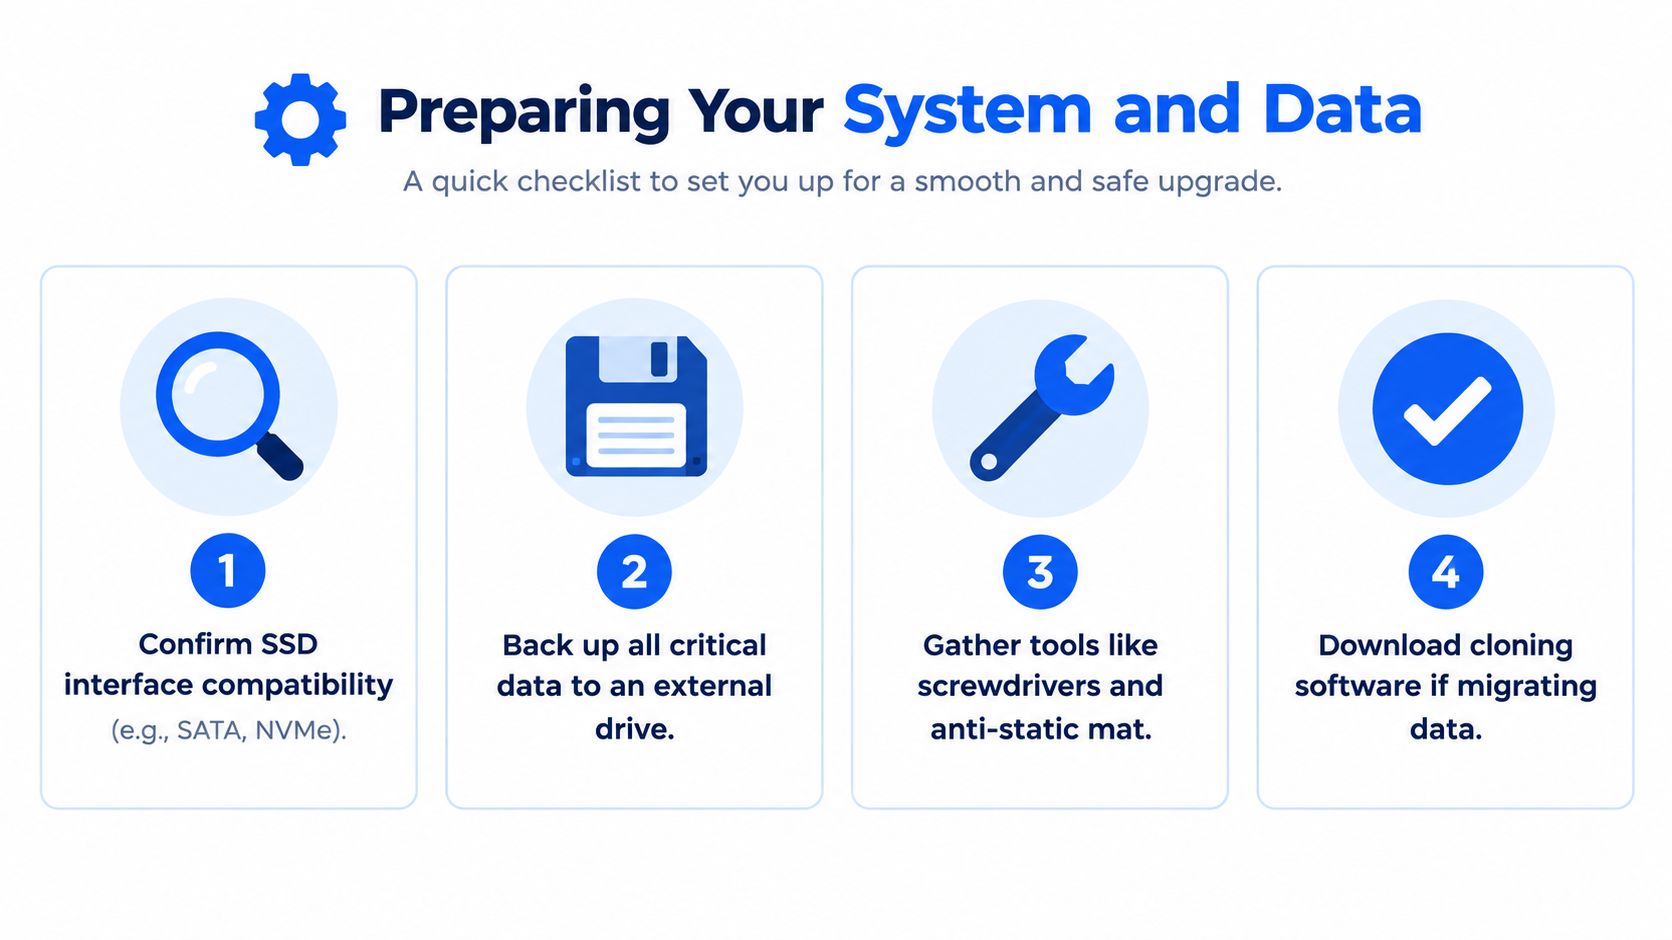
A laptop can look ready for an SSD upgrade while hiding a different storage layout, encrypted data or a failing source drive. Before opening the case, identify the exact model, confirm the replacement drive, and create a separate backup of documents, photos, browser data and business files you cannot recreate.
A safe pre-installation sequence
Confirm the laptop specification. Use the manufacturer's maintenance manual, service guide or parts list for the full model code. Check whether storage is removable, then verify the interface, module length, keying and any capacity limits. The name printed on the lid may cover several configurations, so a retailer's generic compatibility filter is not enough.
Check the capacity requirement. The replacement must hold the data currently in use. A smaller SSD cannot receive a clone if the source contains more data than the SSD can store. Remove temporary files and unused applications only after checking actual used capacity.
Back up independently. Copy important files to an external drive or another controlled location, then open several files to confirm the backup works. A clone is not a backup because one migration error can affect both copies. Specialist data migration service guidance is appropriate when the files matter more than a quick DIY attempt.
Check encryption. If BitLocker is active, save the recovery key and suspend protection before cloning. Cloning an encrypted drive can trigger a recovery-key prompt or cause copy problems if the process is not handled correctly (Which? SSD upgrade guidance).
Inspect drive health. Review SMART information and watch for read errors, freezing or unstable operation. A failing source drive should be imaged or recovered in a controlled way. Repeated ordinary cloning attempts can stall, fail or transfer corrupted files.
Choose the migration method. For a healthy installation, connect the new SSD through a suitable SATA-to-USB adaptor or enclosure and clone the source. For a troubled installation, prepare Windows installation media and plan a clean setup.
Why drive health changes the plan
Cloning reads the original disk across its sectors. Unreadable areas can produce an incomplete installation, while existing malware, damaged system files and accumulated software problems may be copied to the new SSD. A clean installation avoids those inherited issues, but requires reinstalling applications and restoring user data.
Keep the original drive untouched until the new system boots and the backup has been checked. Do not format it immediately. It remains a fallback while you verify applications, user folders, encryption status and licensing.
Installing the SSD and Configuring BIOS
Once compatibility, backup and drive health are settled, the physical installation is usually methodical. Shut the laptop down fully, disconnect its charger and remove removable batteries where the design allows it. Work on a clear surface, use the correct screwdriver and control static electricity with an anti-static wrist strap or suitable mat.
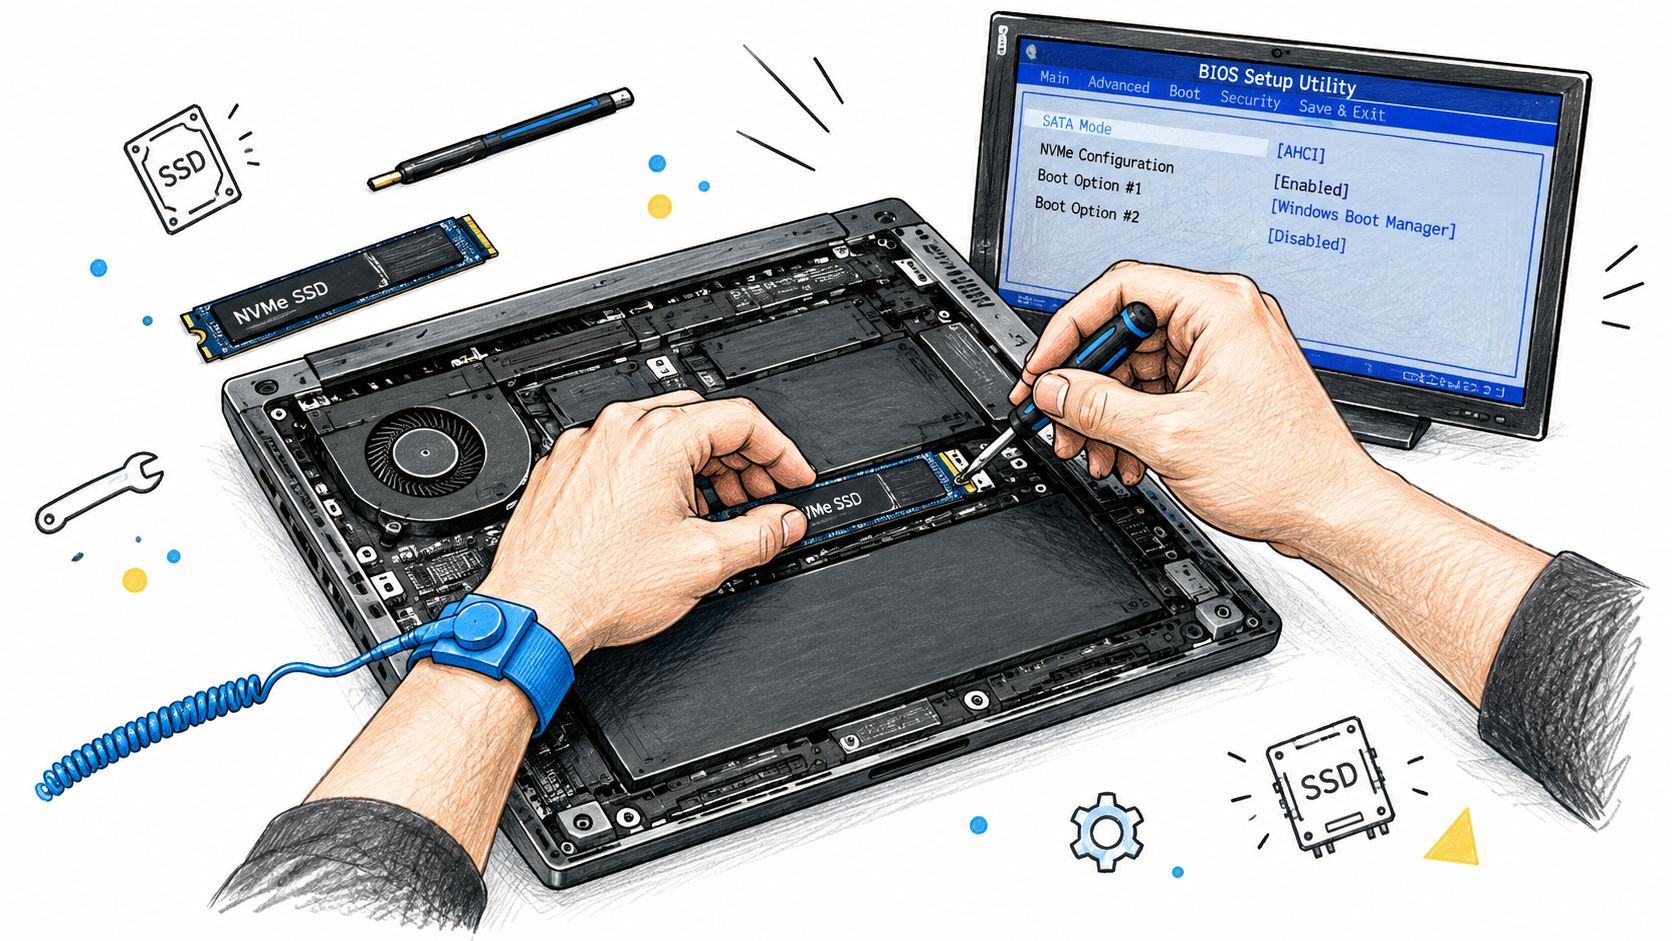
Remove the base carefully and keep screws organised because laptops often use different lengths. Disconnect the battery internally if the service manual instructs you to do so. For a 2.5-inch drive, remove the bracket or caddy and transfer any mounting hardware. For an M.2 drive, remove its retaining screw, slide the old module out at the correct angle, insert the replacement into the slot and secure it without overtightening.
Don't force a drive into a connector. If the screw hole doesn't align or the module sits at an unusual angle, stop and check the part number, keying and installation guide. Resistance often indicates an incompatible component or a misplaced mounting point.
Firmware checks after the swap
Reconnect the battery and close the case enough to test the laptop before fully tightening every screw. Enter the firmware setup using the manufacturer's key, then confirm that the new SSD appears in the storage information. On modern systems this is usually UEFI rather than legacy BIOS, and the UEFI versus BIOS explanation covers why the distinction matters.
If you cloned Windows, set the new SSD or Windows Boot Manager as the first boot option. A correct clone can still appear not to work when the firmware tries the wrong device or when the boot mode doesn't match the original installation.
TRIM should be available for a supported SSD and operating system. It allows the system to manage unused blocks efficiently. In most current Windows installations, the operating system handles SSD optimisation automatically, so manual defragmentation is not an appropriate performance fix.
Use the video below as a visual reference for the general installation process, but follow the service manual for your particular laptop because internal layouts and screw positions differ.
After the first successful boot, leave the original drive disconnected or clearly identified until testing is complete. This prevents accidentally starting from the old installation and mistaking it for a successful migration.
Verifying Performance and Troubleshooting
A laptop that reaches the Windows desktop has not necessarily completed the upgrade correctly. Check that the expected SSD is installed, the full capacity is visible and the machine is using the intended boot device.
Open Windows Disk Management and confirm the partition layout. Check File Explorer for the expected usable space, then inspect Device Manager for storage-controller warnings. If the laptop reports less capacity than expected, check whether a recovery partition or unallocated space needs attention before changing anything.
The common failure points
If the SSD doesn't appear in firmware, power the laptop down and reseat the drive. For an M.2 installation, confirm that the module is fully inserted and secured. For a 2.5-inch replacement, inspect the connector, caddy and cable. If the manual specifies a particular slot or supported protocol, revisit that information before assuming the SSD is defective.
If the SSD appears in firmware but Windows won't start, review the boot order and confirm that Windows Boot Manager is selected. A clone may also fail when the source used legacy boot settings and the replacement environment expects UEFI, or when the cloning process did not copy the required system partition.
Performance that feels disappointing can have several causes. An older laptop may expose a SATA interface even when the new drive is an NVMe model, or the system may still be booting from the original HDD. Confirm the active disk in Task Manager and check the connection type reported by the operating system.
Stop and preserve evidence: Repeated boot attempts, improvised partition changes and formatting can reduce your options if the original drive contains the only copy of important files.
Run normal tasks rather than relying only on a benchmark. Start Windows several times, open the applications you use most, check sleep and restart behaviour, test Wi-Fi and confirm that personal folders open correctly. Watch for blue screens, freezes, unusual heat or warnings in the SSD's health utility.
If the new drive repeatedly disappears, the laptop may have a connector, board or power fault rather than a simple storage problem. At that point, testing another compatible drive can help isolate the issue, but don't sacrifice the original data source while experimenting.
When to Seek Professional Upgrade Help
An SSD swap is a sensible DIY job when the laptop has a removable drive, the service manual is clear, the existing disk is healthy and the backup has been tested. The decision changes when model-level compatibility or data condition is uncertain. Confirm the exact model variant and storage interface before opening the case.
A failing HDD is the clearest reason to stop. Clicking, repeated freezes, read errors and missing folders indicate that preserving data matters more than gaining speed. Standard cloning can add stress and reproduce damaged files on the new drive. A technician can create a controlled image or use sector-level recovery methods before attempting the upgrade.
Soldered storage is another boundary. If the documentation shows that storage is attached to the motherboard, a conventional SSD replacement will not solve the limitation. Board-level work may require specialist equipment and micro-soldering, while an unsuccessful attempt can turn a capacity problem into a system-board repair.
Situations where DIY becomes poor value
Unclear compatibility: The laptop has regional or configuration variants, and the manual does not confirm whether the slot supports SATA, NVMe or any upgrade.
Encrypted installation: BitLocker is active, the recovery key is unavailable, or the account and encryption state are not understood.
Critical files: The machine holds business records, family photographs or irreplaceable project data without a verified backup.
Physical complexity: The case uses unusual screws, adhesive, fragile clips or a layout that makes battery disconnection difficult.
Board faults: Charging problems, liquid damage or power symptoms appear alongside the storage issue.
Migration trouble: The clone reports warnings, Windows repeatedly enters recovery or the replacement drive disappears under load.
MacBooks need particular caution because upgradeability varies by model. Some use soldered storage and non-standard internal construction. A replacement may also require operating-system preparation, firmware checks or careful data handling that does not match a standard Windows laptop.
UK pricing guidance places SSD installation with operating-system migration commonly around £65 to £120. A straightforward 256GB SSD installation and migration may take 30 to 45 minutes (UK repair-business pricing guidance). The final quote should reflect the laptop, drive capacity, backup requirements and source-disk condition. A low advertised price may exclude troubleshooting, failing-drive handling or post-installation checks.
Steel City IT provides laptop diagnostics, SSD upgrades, data migration, clean Windows installations and recovery work for failing drives. Provide the exact model and symptoms so the assessment covers compatibility before any parts are purchased.
If one of these situations matches your laptop, an assessment can prevent an avoidable data loss or incompatible purchase. Steel City IT offers model-specific diagnostics and safe migration from its Sheffield workshop.